Send a transfer
In this guide, you will learn how to send native funds between two addresses using the MARCO API.
Before you begin
Before you start, complete the following prerequisites:
1. Get permission to use the wallet
To grant privileges to the service account to use the sender's wallet, follow these steps:
Open MARCO Console.
On the left sidebar, go to Wallet Instances > Instances.
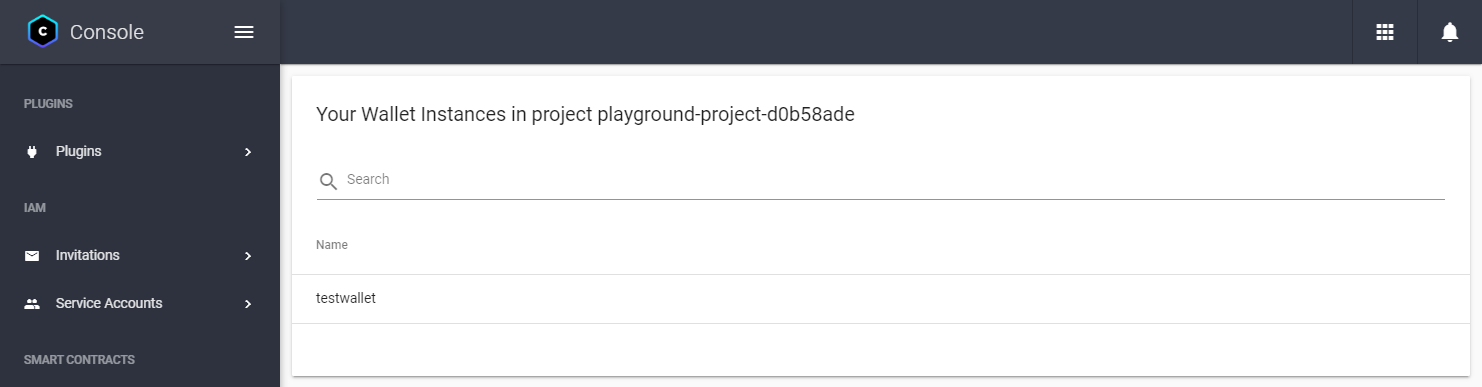
Choose the wallet that will sign the transaction.
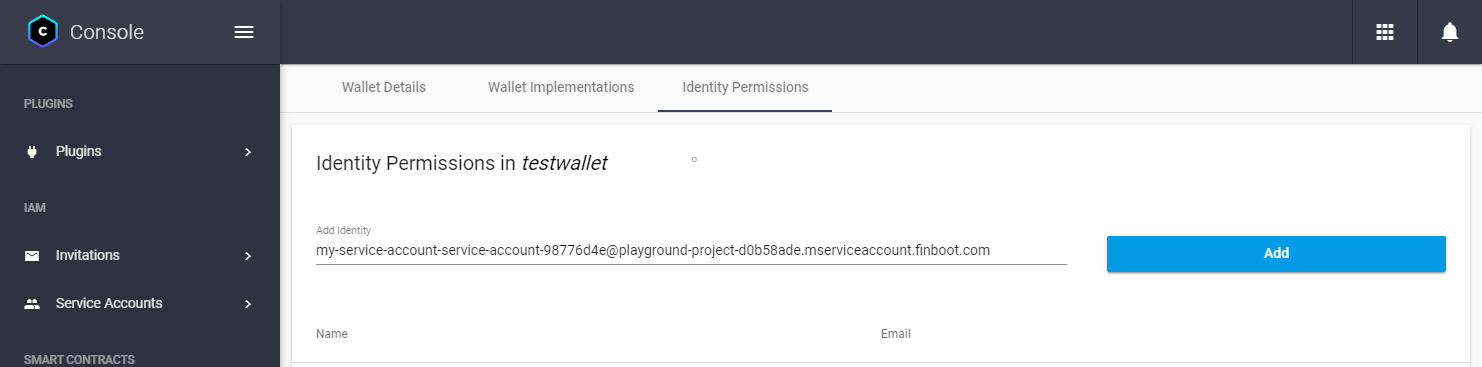
Open the Identity Permissions tab.
In the Add Identity field, write the service account's email address that will make the API call.
 note
noteYou can find the service account's email address in the Service Accounts > List Service account page on the MARCO Console.
Click Add. This will add the service account to the list of identities with permission to view the wallet.
Choose the service account from the list.
In the Grant Role field, select Wallets user.
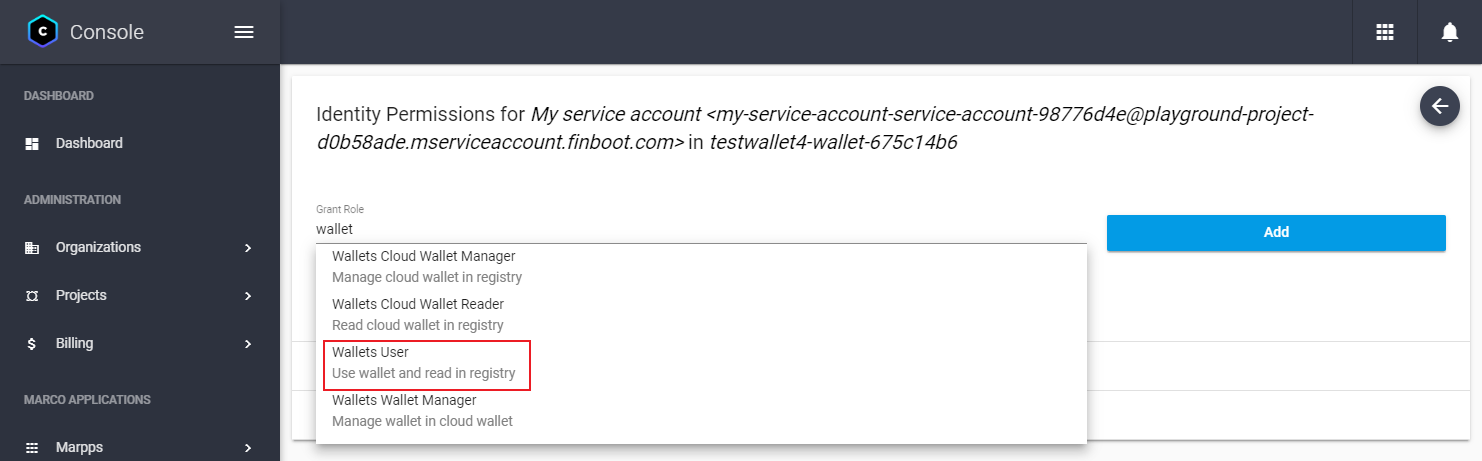
Click Grant. This will grant the service account permission to use the wallet.
2. Send the transaction
To send a transaction, you have two options:
Use the recipient's MARCO wallet id: Send a
POSTrequest tohttps://api-marco.finboot.com/resource-proxy/marco-cloud-wallet/api/v1/cloud-wallet/send-glo-transactionendpoint as follows:curl --location --request POST 'https://api-marco.finboot.com/resource-proxy/marco-cloud-wallet/api/v1/cloud-wallet/send-glo-transaction' \
--header 'ApplicationToken: <APPLICATION_TOKEN>' \
--header 'Authorization: Bearer <ACCESS_TOKEN>' \
--header 'Content-Type: application/json' \
--data-raw '{
"glo":{
"version":"0.1.0",
"type":"transfer",
"options":{
"recipient":{
"lookup_service":{"type":"marco","value":"marco"},
"resource":"<RECIPIENT_WALET_ID>"
},
"amount":"<AMOUNT>"
},
"meta":{}
},
"walletId":"<SENDER_WALET_ID>",
"password":"<SENDER_WALET_PASSWORD>",
"options":{"secureSessionToken":null}
}'Replace:
APPLICATION_TOKEN: The marpp token from the Get your API tokens guide.ACCESS_TOKEN: The service account token from the Get your API tokens guide.RECIPIENT_WALLET_ID: The resource ID of the wallet you want to send the transaction. For example,test-wallet-recipient.AMOUNT: The number of native tokens you want to send. Your wallet must have at least this amount of tokens. For example,0x0.SENDER_WALLET_ID: The resource ID of the wallet you want to send the transaction from. For example,test-wallet-sender. This wallet must have at least theAMOUNTof native tokens you want to send.SENDER_WALET_PASSWORD: The password of the wallet you want to send the transaction from.
Use the recipient's native address: Send the same request as the previous method, but define the recipient's native address in the
glo.options.recipientfield....
"glo":{
"version":"0.1.0",
"type":"transfer",
"options":{
"recipient":{
"lookup_service":{"type":"ledger","value":"<DLT_ID>"},
"resource":"<RECIPIENT_WALLET_ADDRESS>"
},
"amount":"<AMOUNT>"
},
"meta":{}
},
...Replace:
DLT_ID: One of the supported DLT's. For example,ethereum.RECIPIENT_WALLET_ADDRESS: The native address of the wallet you want to send the transaction. For example,0x1234567890abcdef1234567890abcdef12345678.
Depending on the DLT chosen, you might need to specify additional parameters in the GLO meta field. For example, the gasPrice information for Ethereum public network. For more information, refer to the GLO specification.
Once the request is sent, the API will return the transaction locator. For example:
{
    "version": "0.0.1",
    "ledgerId": "finboot-clique-v1",
    "locator": "0x3647379f63fc5a6833a0fe6ac7e08e33eaeffa5d84404a977f41fd22da1c3bad",
    "trl": {...},
    "intent": "c0f9e7b7-cd26-4025-beae-b5a41dcc61af",
    "receipts": [
        {
            "hash": "0x3647379f63fc5a6833a0fe6ac7e08e33eaeffa5d84404a977f41fd22da1c3bad"
        }
    ]
}
3. Check the transaction status
Finally, you can check the transaction status using the transaction locator from the previous step.
To do this, send a POST request to the https://api-marco.finboot.com/ledgeropsgateway/ledger/operation/transaction/search?ledgerId=<LEDGER_ID>&locator=<LOCATOR_ID> endpoint as follows:
curl --location --request GET 'https://api-marco.finboot.com/ledgeropsgateway/ledger/operation/transaction/search?ledgerId=<LEDGER_ID>&locator=<LOCATOR_ID>&withReceipt=true' \
--header 'ApplicationToken: <APPLICATION_TOKEN>' \
--header 'Accept: application/json' \
--header 'Authorization: Bearer <ACCESS_TOKEN>'
Replace:
APPLICATION_TOKEN: The marpp token from the Get your API tokens guide.ACCESS_TOKEN: The access token from the Get your API tokens guide.LEDGER_ID: The ID of the network associated to the that belongs to the ledger. For example, you can useLGR-3c8de984e49forfinboot-clique-v1network. To get the list of ids, see Networks.LOCATOR_ID: The locator ID of the transaction you sent in the previous step. For example,0x3647379f63fc5a6833a0fe6ac7e08e33eaeffa5d84404a977f41fd22da1c3bad.
Once the transaction receives a confirmation, you should see status set to succeeded in the response.
{
    "locator": "0x3647379f63fc5a6833a0fe6ac7e08e33eaeffa5d84404a977f41fd22da1c3bad",
    "status": "succeeded"
}